Introduction
In this series, I’d like to talk about some of the DevOps related challenges facing a solo developer or small team shipping a web-based product. I’m currently working on a web-based binary reverse engineering tool, which requires a frontend, backend, database and some worker machines. While going through the process, I decided to write everything down so other people can learn from it too.
Since my available time and resources are limited, I should be careful not to overcomplicate things. In this post I’ll write about setting up a simple Kubernetes cluster. In later posts I’ll touch on improving reliability and adding logging & observability as well as other important aspects to make sure your application is running as intended.
When trying to deploy a few containers you might be tempted to just spin up a machine in the cloud, and use docker-compose to handle orchestrating your containers. In this post I’ll show that using Kubernetes for the same purpose doesn’t have to be much more complex. With kubernetes you can describe your infrastructure using code with terraform, so you never need to guess how your servers are set up. It’s also easy to add features such as Continuous Deployment and autoscaling when desired at a later time.
Install Packages
First we’ll need to install all the software needed in the following sections: terraform, azure-cli, kubectl and helm.
- On Arch linux, terraform is just a single
sudo pacman -S terraformaway. Similarly on MacOS you canbrew install terraform. - We can install
azure-clifrom the AUR, or usingbrew install azure-clion MacOS. Log in to your azure account usingaz login. - Third we need
kubectlto control the Kubernetes cluster. Install usingsudo pacman -S kubectlorbrew install kubectl. - Finally we need to install
helmto easily install packages resources into our newly created cluster:sudo pacman -S helm, orbrew install helm.
Set up a Terraform project
Before we can do anything else we need to get our kubernetes cluster running. We’ll start by creating an empty terraform project, and then add the actual cluster configuration in the next section.
For this part we’ll mostly follow the Hashicorp AKS tutorial but we’ll make some small changes to it.
We’ll start with a clean git repository, and add a versions.tf file:
terraform {
  required_providers {
    azurerm = {
      source  = "hashicorp/azurerm"
      version = "=3.0.0"
    }
  }
}
Instead of authenticating using a Service Principal, like in the tutorial, we’ll use the azure cli, so can skip that part. We also don’t need any outputs since we will use azure-cli to fetch the credentials for our created cluster later.
Confirm that everything works by running terraform init followed by terraform plan. It should print No changes. Your infrastructure matches the configuration..
Create AKS cluster
Next, to actually tell terraform about the cluster we want to create, we describe it in a new file called aks-cluster.tf file. Add the following contents to the newly created file:
# Configure the Microsoft Azure Provider
provider "azurerm" {
  features {}
}

# Resource Group
resource "azurerm_resource_group" "default" {
  name     = "testcluster-rg"
  location = "West Europe"
}

# AKS Cluster
resource "azurerm_kubernetes_cluster" "default" {
  name                = "testcluster-aks"
  location            = azurerm_resource_group.default.location
  resource_group_name = azurerm_resource_group.default.name
  dns_prefix          = "testcluster-k8s"

  default_node_pool {
    name                         = "system"
    node_count                   = 1
    vm_size                      = "Standard_B2s"
    os_disk_size_gb              = 30
    only_critical_addons_enabled = true
  }

  identity {
    type = "SystemAssigned"
  }
}

# Application node pool
resource "azurerm_kubernetes_cluster_node_pool" "default" {
  name                  = "application"
  kubernetes_cluster_id = azurerm_kubernetes_cluster.default.id
  vm_size               = "Standard_B2s"
  os_disk_size_gb       = 64
  node_count            = 1
  min_count             = 1
  max_count             = 5
  enable_auto_scaling   = true
}
Since this is a simple cluster used to deploy an MVP, we’ll use a system node pool with a single node that can only run system pods (only_critical_addons_enabled = true). If reliability requirements increase, this pool size can be increased to provide some redundancy on system services.
For the application pool we also use a relatively small instance type (B2s, 2vCPU, 4 GiB), however unlike the system pool we run more than one node to provide some redundancy in case of a node failure. 1 Once your application is seeing some constant load, it probably makes sense to move away from the B-series burstable instances. For example you can choose F2s_v2 (2vCPU, 4Gib) or D2s_v5 (2vCPU, 8Gib) if your application is more memory intensive.
We use autoscaling to scale between 1 and 5 nodes to give us some breathing room in order to resolve scheduling constraints when doing rolling upgrades. Using a scaling pool with relatively small-sized instances also allows us to scale properly with the daily flow of traffic. For example, in my case I expect significantly more traffic during business hours. In practice, the pool will always contain at least two nodes due to scheduling constraints we’ll put in place later.
Autoscaling is handled by the kubernetes scheduler. When it’s no longer possible to schedule a new container on the existing nodes, it spins up an extra node. For example, this can happen because it ran out of cpu/memory requests.
We can verify everything looks good using terraform plan and create the cluster using terraform apply. This takes about 5 to 10 minutes.
When the cluster is created we can grab the kubeconfig using az aks get-credentials --resource-group testcluster-rg --name testcluster-aks. Verify that you can run kubectl commands by running kubectl get nodes, which should output one running system node and one running application node.
$ kubectl get nodes
NAME                                  STATUS   ROLES   AGE     VERSION
aks-application-57278411-vmss000000   Ready    agent   6m39s   v1.25.6
aks-system-39976905-vmss000000        Ready    agent   9m40s   v1.25.6
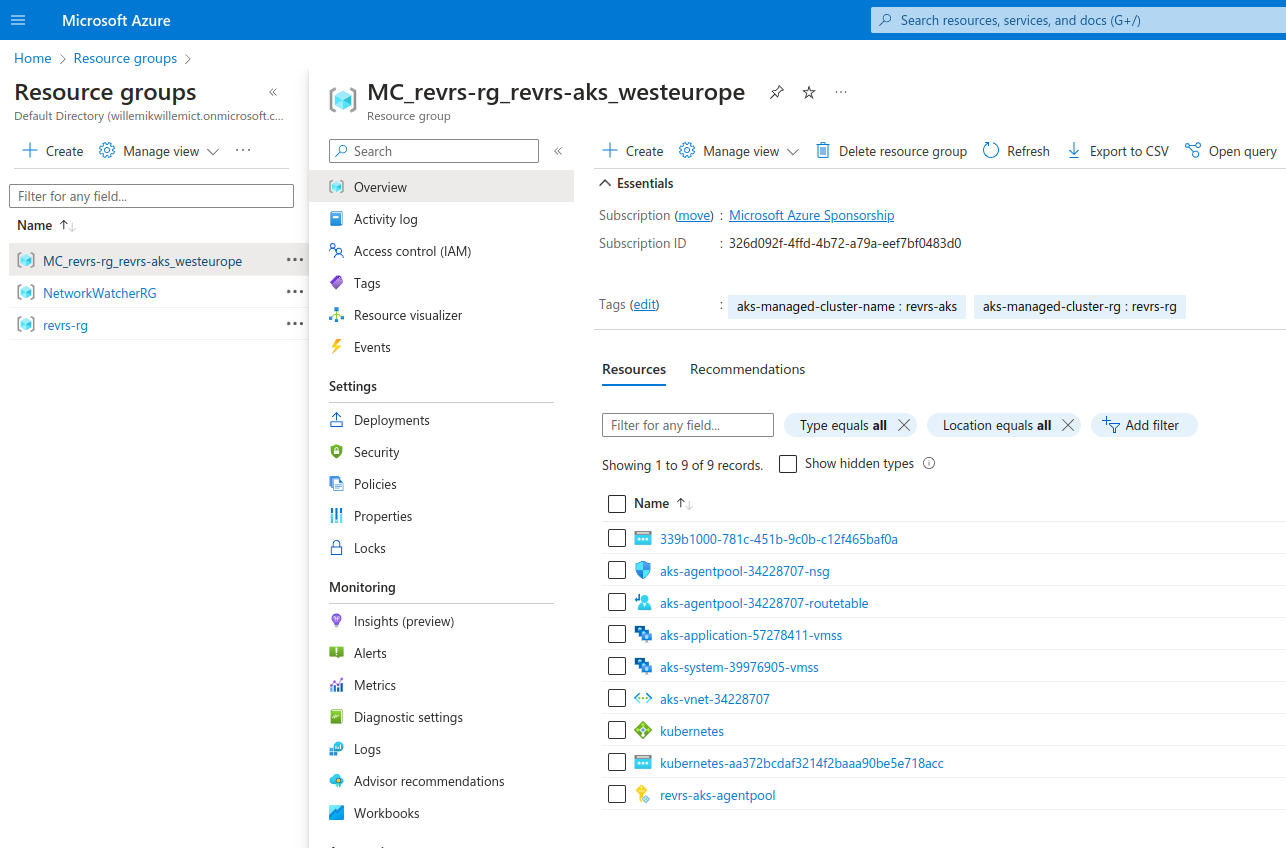
We can also check the azure portal for our created resources. We can see an aks resource in the resource group specified in aks-cluster.tf, as well as a derived resource group containing all the load balancers and node pool.
Install nginx ingress controller
To expose your application to the rest of the internet, and take care of SSL termination you need an ingress controller. A good choice for this is the nginx ingress which can be easily installed using helm.
We can then install the nginx ingress helm chart using:
helm install ingress-nginx oci://ghcr.io/nginxinc/charts/nginx-ingress \
    --namespace ingress-nginx \
    --create-namespace \
    --set controller.replicaCount=1
You can increase the number of replicas, but for now 1 is enough.
Installing this chart will create a service with type LoadBalancer in the ingress-nginx namespace. On the Azure side this will create a new rule in the cluster’s load balancer, and it will attach a new external IP to it. It’s also possible to create an external IP using terraform, and use it by adding --set controller.service.loadBalancerIP=XXXX to the helm command.
Run kubectl get services -n ingress-nginx to verify the ingress controller is running, and find the external IP address to point your DNS to.
Serving a test application on HTTP
Before dealing with HTTPS and certificates, we want to make sure our ingress and DNS are working correctly. We can install a simple nginx application consisting of a deployment, service and ingress in demo.yml:
apiVersion: v1
kind: Namespace
metadata:
  name: demo
---
apiVersion: apps/v1
kind: Deployment
metadata:
  name: demo
  namespace: demo
spec:
  replicas: 1
  selector:
    matchLabels:
      app: demo
  template:
    metadata:
      labels:
        app: demo
    spec:
      containers:
      - name: demo
        image: nginx:stable
        ports:
        - containerPort: 80
---
apiVersion: v1
kind: Service
metadata:
  name: demo
  namespace: demo
spec:
  ports:
  - port: 80
  selector:
    app: demo
---
apiVersion: networking.k8s.io/v1
kind: Ingress
metadata:
  name: demo
  namespace: demo
  annotations:
    kubernetes.io/ingress.class: "nginx"
spec:
  rules:
  - host: app.example.com
    http:
      paths:
        - path: /
          pathType: Prefix
          backend:
            service:
              name: demo
              port:
                number: 80
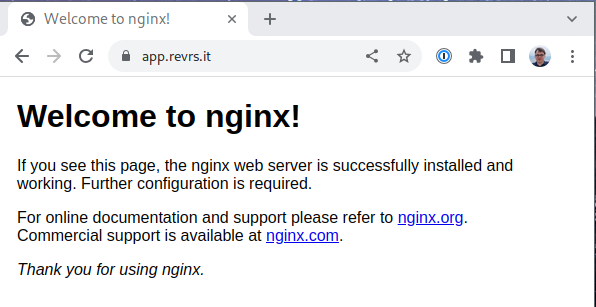
Apply using kubectl apply -f demo.yml and visit http://app.example.com to verify everything is working.
Install cert-manager
We can use cert-manager to automatically get certificates using Let’s Encrypt and install them on the nginx ingress controller. Add the jetstack helm repo with helm repo add jetstack https://charts.jetstack.io and install cert-manager with the following command:
helm install \
  cert-manager jetstack/cert-manager \
  --namespace cert-manager \
  --create-namespace \
  --version v1.12.0 \
  --set installCRDs=true
We then create cluster-issuer.yml with the following content to tell cert-manager to grab certificates from Let’s Encrypt:
apiVersion: cert-manager.io/v1
kind: ClusterIssuer
metadata:
  name: letsencrypt-prod
spec:
  acme:
    # Do not forget to replace this email address with your own.
    # Let's Encrypt will use this to contact you about expiring
    # certificates, and issues related to your account.
    email: user@example.com
    server: https://acme-v02.api.letsencrypt.org/directory
    privateKeySecretRef:
      name: letsencrypt-prod
    solvers:
    - http01:
        ingress:
          ingressClassName: nginx
Install using kubectl apply -f cluster-issuer.yml to install it in the default namespace. Make sure to first replace the email with your own.
Serving a test application on HTTPS
To get a certificate for our application we just need to update the annotation on our ingress and include a tls section. Our ingress definition now looks like:
apiVersion: networking.k8s.io/v1
kind: Ingress
metadata:
  name: demo
  namespace: demo
  annotations:
    kubernetes.io/ingress.class: "nginx"
    cert-manager.io/cluster-issuer: letsencrypt-prod
    acme.cert-manager.io/http01-edit-in-place: "true"
spec:
  rules:
  - host: app.example.com
    http:
      paths:
        - path: /
          pathType: Prefix
          backend:
            service:
              name: demo
              port:
                number: 80
  tls:
    - hosts:
      - app.example.com
      secretName: demo-cert
Update using kubectl apply -f demo.yml. After giving cert-manager some time to grab the certificate, verify that https://app.example.com now works as intended. The http01-edit-in-place: "true" annotation is need to prevent an issue between serving the challenge on HTTP, and the 301 the ingress puts in place to redirect all HTTP traffic to HTTPS. You can find some more information here.
For more complicated deployment I would recommend moving your DNS to Azure and using the DNS challenge. This also allows you to request wildcard certificates.
Conclusion
We now have a simple kubernetes cluster we can use to host our applications. In the next part of this series we’ll discuss some Deployment settings to improve the resilience of your application during updates and kubernetes upgrades.
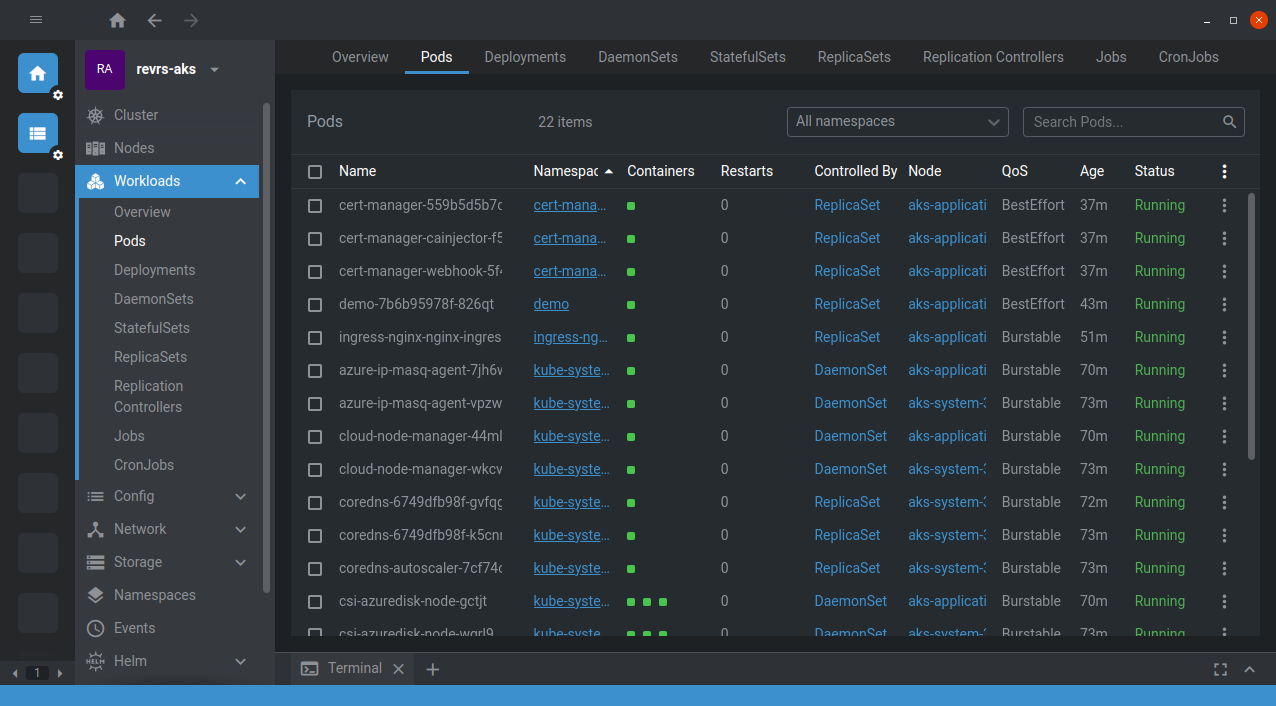
I can also recommend OpenLens to get some more insight on how your cluster is behaving. This is especially useful when monitoring if everything is still running during large upgrades.
-
In about 2 years of running a production application I’ve once seen a silent node failure. The node stayed online, but scheduled pods didn’t get any work done. I therefore recommend running more than one instance of any container, and make sure they are spread out over multiple nodes. We’ll discuss how to implement that in a future post. ↩